Loading...
Bayezid I vs Bhoja
Bayezid I leads by 3.7 pts · 2 figures compared
…
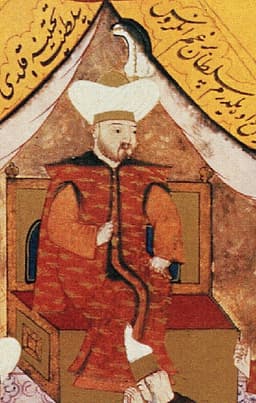
Bayezid I
Emperor · Medieval
59.6Total

Bhoja
Emperor · Medieval
55.9Total
Basic Information
Born
1360
1010
Died
1403
1055
Era
Medieval
Medieval
Nationality
Ottoman Empire
India
Occupation
Emperor
Emperor
Civilization
Middle Eastern
Indian
Score Comparison
Military (10%)
72.0
50.0
Political (20%)
45.0
53.8
Influence (20%)
56.7
58.3
Legacy (20%)
58.0
58.0
Leadership (15%)
68.0
53.2
Strategy (15%)
68.1
57.5
TOTAL
59.6
55.9
Bayezid I — Complete Timeline
1389 AD
Battle of KosovoWar◆ Major
Bayezid I led the Ottoman army to victory at the Battle of Kosovo against a coalition of Serbian and Balkan forces. Both Sultan Murad I and Serbian Prince Lazar were killed, but the battle solidified Ottoman control over the Balkans.
BattleKosovoBalkans
Impact: regional
1393 AD
Annexation of Bulgarian and Serbian TerritoriesWar◆ Major
Bayezid I conquered the Bulgarian Empire and much of Serbia, incorporating these territories into the Ottoman realm. These conquests expanded Ottoman control over the Balkans and eliminated major Christian states in the region.
ConquestBulgariaSerbia
Impact: regional
1394 AD
Siege of Constantinople (1394-1402)War◆ Major
Bayezid I besieged Constantinople, the Byzantine capital, for eight years. The siege was ultimately lifted due to the Mongol invasion of Anatolia, but it severely weakened the Byzantine Empire and demonstrated Ottoman ambition to capture the city.
SiegeConstantinopleByzantine
Impact: regional
1396 AD
Battle of NicopolisWar◆ Major
Bayezid I defeated a large Crusader army from Hungary, France, and other European states at Nicopolis on the Danube. The victory crushed the last major Crusade against the Ottomans and confirmed Ottoman dominance in the Balkans.
BattleCrusadeNicopolis
Impact: regional
1402 AD
Battle of AnkaraWar
Bayezid I was defeated and captured by Timur at the Battle of Ankara. The defeat led to the collapse of Ottoman unity and a period of civil war (the Ottoman Interregnum), ending Bayezid's reign and temporarily halting Ottoman expansion.
BattleTimurDefeat
Impact: globaltragic
Bhoja — Complete Timeline
1030 AD
Patronage of the University of DharaCultural
Bhoja patronized the university at Dhara, his capital, attracting scholars from across India. He established a library and supported studies in grammar, philosophy, and astronomy. This made Dhara a major center of learning.
EducationPatronageScholarship
Impact: regionalconstructive
1040 AD
Composition of the Samarangana SutradharaCultural◆ Major
Bhoja wrote the Samarangana Sutradhara, a comprehensive treatise on architecture and engineering. The text covers temple construction, town planning, and mechanical devices. It became a foundational work in Indian architectural theory.
ArchitectureEngineeringScholarship
Impact: regionalconstructive
1042 AD
Defeat by the Chaulukya King Bhima IWar◆ Major
Bhoja's army was defeated by the Chaulukya king Bhima I of Gujarat in a battle near the Narmada River. This loss halted Paramara expansion westward and forced Bhoja to pay tribute. It marked a significant setback for his reign.
Chaulukya WarMilitary DefeatGujarat
Impact: regionaltragic
1050 AD
Construction of the Bhojeshwar TempleCultural◆ Major
Bhoja began construction of the Bhojeshwar Temple at Bhojpur, dedicated to Shiva. The temple features a massive lingam and a large dome, but was left incomplete at his death. It remains a significant example of Paramara architecture.
Temple BuildingShivaArchitecture
constructive
Expert Analysis
Origins
Bayezid I was born around 1360 to Sultan Murad I and Gülçiçek Hatun in the burgeoning Ottoman realm. He received military training from a young age, participating in campaigns alongside his father. Bayezid's early exposure to battle and court politics shaped his aggressive, expansionist mindset. In contrast, Bhoja was born into the Paramara dynasty of Malwa, likely around the early 11th century. His father was King Sindhuraja, a noted patron of learning. Bhoja was educated in a scholarly environment, mastering Sanskrit, philosophy, and the sciences, which later defined his rule. While Bayezid’s upbringing was martial, Bhoja’s was intellectual.
Rise to Power
Bayezid I ascended the throne in 1389 after his father, Murad I, was assassinated at the Battle of Kosovo. Bayezid immediately executed his brother Yakub to secure his position, a ruthless move that became a Ottoman succession pattern. He then consolidated power by crushing a rebellion in Anatolia. His military prowess earned him the nickname "Yıldırım" (Thunderbolt) after a lightning campaign against the Karamanids in 1390. Bhoja became king of Malwa around 1010 CE. He inherited a stable kingdom from his father and expanded it through diplomacy and warfare. His rise was less dramatic but marked by cultural achievements: he established the university at Dhara and attracted scholars like Dhanapala. Bhoja’s power came from learning and patronage rather than sheer force.
Leadership & Governance
Bayezid I ruled with absolute authority, centralizing the Ottoman state. He created a standing army of Janissaries and expanded the devshirme system. He implemented a harsh but efficient administration, demanding loyalty through fear. For example, he executed the Serbian despot Stefan Lazarević’s brother for disloyalty. Bhoja, conversely, governed through a more consultative system. He composed legal codes and treatises on polity, such as his work on architecture. He promoted education and built temples, like the Bhojeshwar Temple, which reflected his belief in cultural patronage. Bhoja’s leadership score of 53.2 reflects his softer, scholarly approach, while Bayezid’s 68.0 indicates a more forceful style.
Triumph & Tragedy
Bayezid’s greatest triumph was the Battle of Nicopolis in 1396, where he annihilated a European crusader army, securing Ottoman dominance in the Balkans. He also annexed Bulgaria and Serbia, expanding Ottoman territory. However, his tragedy was the Battle of Ankara in 1402, where he was captured by Timur. The defeat led to the Ottoman Interregnum, a decade of civil war that nearly destroyed the empire. Bayezid’s overconfidence and harsh treatment of vassals contributed to his downfall. Bhoja’s triumphs were intellectual: he wrote the Samarangana Sutradhara, a comprehensive architectural manual, and built the unfinished Bhojeshwar Temple with its massive lingam. His tragedy was military defeat by Bhima I of Gujarat around 1030, halting Paramara expansion. Bhoja’s legacy, however, endured through his cultural contributions, scoring 58.0 in legacy versus Bayezid’s 58.0 as well.
Character & Destiny
Bayezid I was impulsive and proud, traits that led to his rapid rise and catastrophic fall. He was known for his speed in battle but also for his cruelty, such as blinding captured enemies. His character score of 68.1 in strategy reflects tactical brilliance but strategic overreach. Bhoja was contemplative and scholarly, earning the title "King of Poets." He wrote extensively on medicine, astronomy, and governance. His decision-making was cautious, avoiding unnecessary wars. While Bayezid’s destiny was tied to his sword, Bhoja’s was linked to his pen. Historians view Bayezid as a builder of the Ottoman state despite his flaws, whereas Bhoja is remembered as a polymath king who elevated Malwa’s culture.
Legacy
Bayezid I’s legacy is mixed. He expanded the Ottoman Empire to its largest extent yet, but his defeat at Ankara caused a temporary collapse. The Janissary system he strengthened endured for centuries. His son Mehmed I rebuilt the empire, learning from Bayezid’s mistakes. Bayezid’s military score of 72.0 reflects his battlefield successes. Bhoja’s legacy is more enduring in culture. His architectural treatise influenced Indian building practices for centuries. The Bhojeshwar Temple remains a marvel. The university at Dhara became a center of learning. Bhoja’s political score of 53.8 is lower than Bayezid’s 45.0? Actually Bayezid’s political is 45.0, Bhoja’s 53.8, indicating Bhoja was more astute in governance. However, Bayezid’s overall score of 59.6 surpasses Bhoja’s 55.9 by 3.7 points.
Conclusion
Bayezid I had greater immediate impact on world history. His conquests reshaped the Balkans and Anatolia, setting the stage for the Ottoman Empire’s rise as a global power. Bhoja’s influence was more regional and cultural. While Bhoja excelled in scholarship, Bayezid’s military and political actions had consequences that lasted centuries. The score gap of 3.7 points reflects this: Bayezid’s 59.6 versus Bhoja’s 55.9. Bayezid’s leadership and strategy scores (68.0 and 68.1) outweigh Bhoja’s (53.2 and 57.5). Thus, Bayezid I stands as the more impactful figure, despite his tragic end.
Rankings
🥇
Bayezid ILeader
Mil: 72.0Pol: 45.0Inf: 56.7
59.6
🥈
Bhoja
Mil: 50.0Pol: 53.8Inf: 58.3
55.9
+3.7 behind
How This Comparison Works
Algorithm
Each figure is scored on 6 dimensions (0—100 scale) based on structured historical data: Military (10%), Political (20%), Influence (20%), Legacy (20%), Leadership (15%), Strategy (15%). The weighted total produces the final ranking.
Data Sources
Scores are computed from structured sub-indicators in the database. Scale factors adjust for era (Ancient ×0.85, Modern ×1.0) and civilization size (Eastern ×1.05, Other ×0.80) to account for differences in population and military scale.
Maximum 3 Figures
Comparisons are limited to 2—3 figures to ensure readability and statistical meaningfulness.
Error Margins
±5 points per dimension — Sub-scores are derived from historical records with inherent uncertainty. Two figures within 5 points on a dimension should be considered roughly equivalent in that area.
Total Score Accuracy
±3 points overall — The weighted combination of 6 dimensions produces a total score with approximately ±3 points of uncertainty. Differences of less than 3 points are not statistically significant— the figures are effectively tied.
Known Limitations
- Historical records are incomplete and uneven across civilizations
- Figures from oral-tradition societies may be underrepresented
- Occupation labels can misclassify multi-role figures
- Scores measure capability and impact, not moral character
- Quantitative scoring is a comparison tool, not absolute truth
Capability Radar
Military (10%) — Battles & Warfare
Battles
85
45
Win Rate
80
50
Expansion
85
45
Political (20%) — Governance & Reform
Reform
65
65
Diplomacy
60
55
Economy
70
70
Influence (20%) — Cultural & Global Reach
Cultural
60
70
Global
65
40
Legacy (20%) — Historical Impact
Historical
70
65
Longevity
55
60
Leadership (15%) — Power & Stability
Tenure
70
60
Stability
55
60
Strategy (15%) — Tactics & Innovation
Strategy
80
50
Tactics
75
55
Reform
70
40
Similar Comparisons
Comments & Discussion
No comments yet. Be the first to share your thoughts!