Loading...
Emperor Go-Daigo vs Hojo Ujitsuna
Emperor Go-Daigo leads by 3.7 pts · 2 figures compared
…
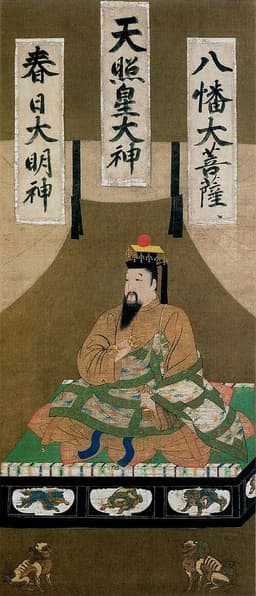
Emperor Go-Daigo
Emperor · Medieval
56.4Total
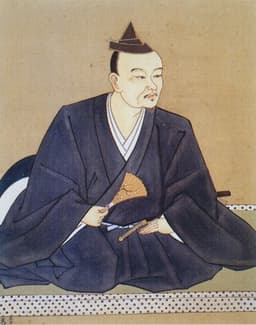
Hojo Ujitsuna
Emperor · Medieval
52.7Total
Basic Information
Born
1288
1487
Died
1339
1541
Era
Medieval
Medieval
Nationality
Japan
Japan
Occupation
Emperor
Emperor
Civilization
Eastern
Eastern
Score Comparison
Military (10%)
35.0
45.0
Political (20%)
68.0
68.0
Influence (20%)
58.0
53.3
Legacy (20%)
56.0
45.8
Leadership (15%)
65.7
53.2
Strategy (15%)
43.3
52.5
TOTAL
56.4
52.7
Emperor Go-Daigo — Complete Timeline
1331 AD
Exile to Oki IslandPolitical Action◆ Major
The Kamakura shogunate exiled Go-Daigo to Oki Island after his first attempt to overthrow them failed. He escaped two years later, rallying support from disaffected samurai and monks to renew his rebellion.
ExileRebellionKamakura Shogunate
Impact: nationaltragic
1333 AD
Kenmu RestorationPolitical Action
Go-Daigo overthrew the Kamakura shogunate and restored direct imperial rule. He issued the Kenmu Code, attempting to reassert imperial authority, but his policies alienated the samurai class, leading to rebellion.
RestorationImperial RuleJapan
Impact: national
1336 AD
Establishment of the Southern CourtPolitical Action
After Ashikaga Takauji turned against him, Go-Daigo fled to Yoshino and established the Southern Court. This created a split in the imperial line, leading to the Nanboku-cho period of rival courts lasting until 1392.
Civil WarImperial SplitNanboku-cho
Impact: national
Hojo Ujitsuna — Complete Timeline
1524 AD
Capture of Edo CastleWar◆ Major
Hojo Ujitsuna captured Edo Castle from the Uesugi clan, expanding Hojo control into the Kanto region. This victory established the Hojo as a major power in the area and laid the foundation for their future dominance.
ConquestEdo CastleKanto
Impact: regional
1526 AD
Siege of Odawara CastleWar◆ Major
Hojo Ujitsuna successfully defended Odawara Castle against a siege by the Uesugi and their allies. The defense solidified Odawara as the Hojo stronghold and demonstrated Ujitsuna's military capability.
SiegeDefenseOdawara
Impact: regional
1537 AD
Expansion into Musashi ProvinceWar
Hojo Ujitsuna led campaigns into Musashi Province, capturing several castles from the Uesugi. This expansion significantly increased Hojo territory and influence in the Kanto region.
ExpansionMusashiUesugi Conflict
Impact: regional
Expert Analysis
Origins
Emperor Go-Daigo (1288–1339) was the 96th emperor of Japan, born into the Daikakuji line of the imperial family. His father, Emperor Go-Uda, promoted cultural pursuits, but Go-Daigo grew determined to restore direct imperial rule after centuries of shogunate dominance. He studied Confucian classics and believed in the emperor's rightful authority. Hojo Ujitsuna (1487–1541) was born into the Hojo clan, a samurai family that rose from obscurity. His father, Hojo Soun, founded the late Hojo dynasty by conquering Izu Province. Ujitsuna inherited his father's ambition and military acumen, expanding Hojo territory into the Kanto region through strategic castle captures.
Rise to Power
Go-Daigo's first attempt to overthrow the Kamakura shogunate in 1324 failed, leading to his exile to Oki Island in 1331. He escaped in 1333, rallying support from disaffected warriors like Ashikaga Takauji and Nitta Yoshisada. The Kamakura shogunate fell that year, and Go-Daigo returned to Kyoto, initiating the Kenmu Restoration. Hojo Ujitsuna rose by capturing Edo Castle from the Uesugi clan in 1524, a victory that established the Hojo as a major power in the Kanto. He followed up by taking Kawagoe Castle in 1537 and expanding into Musashi Province, consistently outmaneuvering the Uesugi through alliances and military campaigns.
Leadership & Governance
Go-Daigo's governance during the Kenmu Restoration (1333–1336) was marked by the Kenmu Code, which sought to reassert imperial authority and reward loyalists. However, his policies alienated key supporters like Ashikaga Takauji by favoring court nobles over samurai. His leadership scored 65.7, reflecting his ideological commitment but poor practical execution. Hojo Ujitsuna ruled Odawara Castle, which he fortified into a formidable fortress. He governed with a focus on territorial expansion and administrative consolidation, scoring 53.2 in leadership. His governance was pragmatic, securing loyalty through land grants and alliances, contrasting with Go-Daigo's idealistic centralization.
Triumph & Tragedy
Go-Daigo's greatest triumph was the overthrow of the Kamakura shogunate and the brief restoration of imperial rule. However, his tragedy came when Ashikaga Takauji turned against him, forcing Go-Daigo to flee to Yoshino and establish the Southern Court in 1336. This split the imperial line for 60 years, undermining his goal of unity. Hojo Ujitsuna's triumph was capturing Edo Castle and expanding Hojo territory to dominate the Kanto. His tragedy was that his successes were regional; the Hojo clan fell to Oda Nobunaga and Toyotomi Hideyoshi later. His legacy scored 45.8, limited by the clan's eventual destruction.
Character & Destiny
Go-Daigo was determined and idealistic, but his inflexibility alienated allies. Historian H. Paul Varley notes his 'uncompromising nature' contributed to the restoration's failure. His political score of 68.0 indicates skill in rallying initial support, but his strategy score of 43.3 reflects poor long-term planning. Hojo Ujitsuna was cautious and methodical, expanding steadily through diplomacy and military pressure. His strategy score of 52.5 shows competence, but his influence score of 53.3 suggests limited impact beyond his region. Both men's characters shaped their fates: Go-Daigo's ambition exceeded his resources, while Ujitsuna's prudence secured short-term gains.
Legacy
Go-Daigo's legacy is the Southern Court, which legitimized the imperial line's resilience. The Kenmu Restoration became a symbol of imperial authority, influencing later movements like the Meiji Restoration. His influence score of 58.0 reflects this enduring symbolic power. Hojo Ujitsuna's legacy is the fortified Odawara Castle and the Hojo clan's dominance in Kanto, which set the stage for later unification. However, his legacy score of 45.8 is lower, as the Hojo were eclipsed by the Three Unifiers. Go-Daigo's impact on Japanese political thought is more profound, while Ujitsuna's was localized.
Conclusion
Emperor Go-Daigo, with a total score of 56.4, had greater historical impact than Hojo Ujitsuna (52.7). Go-Daigo's challenge to shogunate rule and the subsequent Nanboku-cho period reshaped Japan's political landscape, while Ujitsuna's expansions were ultimately temporary. Go-Daigo's influence on the imperial institution's revival outweighs Ujitsuna's regional achievements. The 3.7-point gap reflects Go-Daigo's broader legacy, despite his tactical failures. Thus, Go-Daigo stands as the more significant figure in Japanese history.
Rankings
🥇
Emperor Go-DaigoLeader
Mil: 35.0Pol: 68.0Inf: 58.0
56.4
🥈
Hojo Ujitsuna
Mil: 45.0Pol: 68.0Inf: 53.3
52.7
+3.7 behind
How This Comparison Works
Algorithm
Each figure is scored on 6 dimensions (0—100 scale) based on structured historical data: Military (10%), Political (20%), Influence (20%), Legacy (20%), Leadership (15%), Strategy (15%). The weighted total produces the final ranking.
Data Sources
Scores are computed from structured sub-indicators in the database. Scale factors adjust for era (Ancient ×0.85, Modern ×1.0) and civilization size (Eastern ×1.05, Other ×0.80) to account for differences in population and military scale.
Maximum 3 Figures
Comparisons are limited to 2—3 figures to ensure readability and statistical meaningfulness.
Error Margins
±5 points per dimension — Sub-scores are derived from historical records with inherent uncertainty. Two figures within 5 points on a dimension should be considered roughly equivalent in that area.
Total Score Accuracy
±3 points overall — The weighted combination of 6 dimensions produces a total score with approximately ±3 points of uncertainty. Differences of less than 3 points are not statistically significant— the figures are effectively tied.
Known Limitations
- Historical records are incomplete and uneven across civilizations
- Figures from oral-tradition societies may be underrepresented
- Occupation labels can misclassify multi-role figures
- Scores measure capability and impact, not moral character
- Quantitative scoring is a comparison tool, not absolute truth
Capability Radar
Military (10%) — Battles & Warfare
Battles
35
45
Win Rate
30
50
Expansion
15
55
Political (20%) — Governance & Reform
Reform
70
45
Diplomacy
55
50
Economy
30
55
Influence (20%) — Cultural & Global Reach
Cultural
50
40
Global
30
20
Legacy (20%) — Historical Impact
Historical
65
45
Longevity
55
40
Leadership (15%) — Power & Stability
Tenure
60
50
Stability
25
50
Strategy (15%) — Tactics & Innovation
Strategy
45
60
Tactics
40
55
Reform
20
40
Similar Comparisons
Comments & Discussion
No comments yet. Be the first to share your thoughts!