Loading...
Cao Kun vs John Monash
John Monash leads by 19.4 pts · 2 figures compared
…
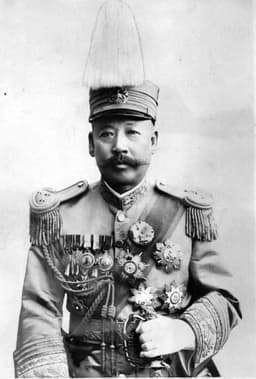
Cao Kun
General · Modern
43.2Total

John Monash
General · Modern
62.6Total
Basic Information
Born
1862
1865
Died
1938
1931
Era
Modern
Modern
Nationality
China
Australia
Occupation
General
General
Civilization
Eastern
Western
Score Comparison
Military (10%)
38.3
80.0
Political (20%)
30.8
68.0
Influence (20%)
51.0
58.3
Legacy (20%)
40.8
52.0
Leadership (15%)
50.7
64.5
Strategy (15%)
41.7
72.0
TOTAL
43.2
62.6
Cao Kun — Complete Timeline
1920 AD
Zhili-Anhui WarWar◆ Major
Cao Kun led the Zhili clique to victory over the Anhui clique in the Zhili-Anhui War. This battle established the Zhili faction as the dominant force in northern China and expanded Cao Kun's political and military power.
Warlord EraWarZhili Clique
Impact: national
1922 AD
First Zhili-Fengtian WarWar◆ Major
Cao Kun's Zhili forces defeated the Fengtian clique under Zhang Zuolin in the First Zhili-Fengtian War. This victory solidified Zhili control over Beijing and the central government.
Warlord EraWarZhili Clique
Impact: national
1923 AD
Presidential Bribery ScandalPolitical Action
Cao Kun bribed members of the National Assembly to elect him President of the Republic of China, spending millions of yuan. This scandal discredited the Republican government and deepened public cynicism toward warlord politics.
Republic of ChinaCorruptionPresidency
Impact: nationaldestructive
1924 AD
Second Zhili-Fengtian WarWar◆ Major
Cao Kun's Zhili clique was defeated by the Fengtian clique in the Second Zhili-Fengtian War. The loss led to his overthrow and house arrest, ending his political career and the Zhili dominance.
Warlord EraWarDefeat
Impact: nationaltragic
John Monash — Complete Timeline
1917 AD
Battle of BroodseindeWar
Monash commanded the 3rd Australian Division at the Battle of Broodseinde during the Third Battle of Ypres. His division captured its objectives with relatively low casualties. This was one of the most successful Australian operations of the war, though the overall campaign later bogged down.
World War IWestern FrontYpres
Impact: regionalconstructive
1918 AD
Battle of HamelWar◆ Major
Monash planned and commanded the Battle of Hamel, a combined arms assault using infantry, tanks, artillery, and aircraft. The attack succeeded in 93 minutes with minimal casualties. This battle became a model for later Allied offensives and demonstrated Monash's innovative tactical approach.
World War IWestern FrontCombined Arms
Impact: regionalconstructive
Battle of AmiensWar
Monash commanded the Australian Corps at the Battle of Amiens, the opening of the Hundred Days Offensive. His corps advanced over 7 miles on the first day, capturing thousands of prisoners. This battle marked the beginning of the end for the German army on the Western Front.
World War IWestern FrontHundred Days
Impact: globalconstructive
Expert Analysis
Origins
Cao Kun (1862-1938) was born into a military family in Tianjin, China. He joined the Beiyang Army under Yuan Shikai, rising through the ranks due to loyalty and connections. His early career was shaped by the chaos of the late Qing dynasty and the early Republic, where military power often trumped law. He lacked formal education but possessed street smarts and a talent for networking.
John Monash (1865-1931) was born in Melbourne, Australia, to Jewish immigrant parents. He excelled academically, earning degrees in engineering and law from the University of Melbourne. Monash worked as a civil engineer before joining the militia, where he developed a methodical, detail-oriented approach. His background in engineering would later revolutionize warfare.
Rise to Power
Cao Kun rose during the fragmentation of China after Yuan Shikai's death in 1916. He aligned with the Zhili clique, led by Feng Guozhang, and after Feng's death, Cao took control. His key turning point was the Zhili-Anhui War in 1920, where his forces defeated the Anhui clique, making the Zhili faction dominant in northern China. In 1922, the First Zhili-Fengtian War saw Cao defeat Zhang Zuolin, solidifying his control over Beijing. However, his ambition led him to bribe the National Assembly in 1923 to elect him President, spending millions of yuan—a scandal that tarnished his legitimacy.
Monash rose through merit and technical skill. His big break came in World War I, where he commanded the 4th Infantry Brigade at Gallipoli in 1915. Despite the campaign's failure, Monash's logistical skills were noted. Promoted to major general in 1916, he led the 3rd Division in France. His crowning achievement was the Battle of Hamel on July 4, 1918, where he orchestrated a combined arms assault using infantry, tanks, artillery, and aircraft, capturing objectives in 93 minutes with minimal casualties. This success led to his command of the Australian Corps during the Hundred Days Offensive.
Leadership & Governance
Cao Kun's leadership was transactional and corrupt. He relied on patronage and bribery, exemplified by his presidential election scandal. His governance approach was typical of warlords: control through military force and alliances, with little regard for institutions. He failed to unify China or implement reforms, instead focusing on personal enrichment. During his presidency (1923-1924), China remained fragmented, with foreign powers exploiting the chaos.
Monash was a transformative leader who emphasized planning, preparation, and combined arms coordination. He pioneered the use of tanks, aircraft, and artillery in precise timing, reducing casualties. His leadership style was collaborative, consulting subordinates and fostering innovation. He scored 64.5 in leadership compared to Cao's 50.7. Monash's approach was data-driven; for instance, at Amiens, his corps advanced 7 miles on the first day, breaking the German line. He also cared for his troops' welfare, earning their respect.
Triumph & Tragedy
Cao Kun's greatest triumph was the Zhili-Anhui War (1920), which made his clique dominant. However, his presidency was a failure: the bribery scandal discredited him, and his rule ended in 1924 when the Second Zhili-Fengtian War saw his forces defeated. He was placed under house arrest by Zhang Zuolin, effectively ending his career. His legacy is one of corruption and instability.
Monash's triumphs include the Battle of Hamel and the Battle of Amiens (1918), where his corps played a key role in the Allied victory. He is considered one of the best Allied commanders of WWI. His tragedy was that his innovations were not fully implemented after the war, and he died in 1931 before seeing their long-term impact. He also faced anti-Semitism, though his success muted it.
Character & Destiny
Cao Kun was pragmatic and opportunistic, but his greed and lack of vision led to his downfall. He trusted bribery over building institutions, a fatal flaw in the volatile warlord era. His character reflected the era's moral bankruptcy.
Monash was methodical, innovative, and humane. He combined engineering precision with tactical genius. His Jewish heritage and outsider status drove him to prove himself, leading to his disciplined approach. His destiny was to be a war hero, but his impact was limited by peacetime's neglect of his methods.
Legacy
Cao Kun's legacy is minimal: a footnote in Chinese history as a corrupt warlord. His actions contributed to the Republic's instability, paving the way for the KMT and Communist rise. His military score of 38.3 reflects his poor strategic achievements.
Monash's legacy is profound: his combined arms tactics influenced modern warfare. His statue stands in Melbourne, and he is remembered as Australia's greatest general. His military score of 80.0 reflects his effectiveness. However, his overall score of 62.6 is held back by limited political influence and a short active career.
Conclusion
John Monash had greater impact than Cao Kun. Monash's military innovations changed warfare, while Cao Kun's corruption only deepened China's chaos. Monash scored 62.6 overall vs Cao's 43.2, a gap of 19.4 points. Monash's leadership (64.5 vs 50.7) and strategy (72.0 vs 41.7) were superior. Cao Kun's presidency was a stain, not a legacy. Therefore, Monash is the more significant figure.
Rankings
🥇
John MonashLeader
Mil: 80.0Pol: 68.0Inf: 58.3
62.6
🥈
Cao Kun
Mil: 38.3Pol: 30.8Inf: 51.0
43.2
+19.4 behind
How This Comparison Works
Algorithm
Each figure is scored on 6 dimensions (0—100 scale) based on structured historical data: Military (10%), Political (20%), Influence (20%), Legacy (20%), Leadership (15%), Strategy (15%). The weighted total produces the final ranking.
Data Sources
Scores are computed from structured sub-indicators in the database. Scale factors adjust for era (Ancient ×0.85, Modern ×1.0) and civilization size (Eastern ×1.05, Other ×0.80) to account for differences in population and military scale.
Maximum 3 Figures
Comparisons are limited to 2—3 figures to ensure readability and statistical meaningfulness.
Error Margins
±5 points per dimension — Sub-scores are derived from historical records with inherent uncertainty. Two figures within 5 points on a dimension should be considered roughly equivalent in that area.
Total Score Accuracy
±3 points overall — The weighted combination of 6 dimensions produces a total score with approximately ±3 points of uncertainty. Differences of less than 3 points are not statistically significant— the figures are effectively tied.
Known Limitations
- Historical records are incomplete and uneven across civilizations
- Figures from oral-tradition societies may be underrepresented
- Occupation labels can misclassify multi-role figures
- Scores measure capability and impact, not moral character
- Quantitative scoring is a comparison tool, not absolute truth
Capability Radar
Military (10%) — Battles & Warfare
Battles
30
75
Win Rate
35
85
Expansion
25
60
Political (20%) — Governance & Reform
Reform
10
40
Diplomacy
20
50
Economy
15
30
Influence (20%) — Cultural & Global Reach
Cultural
15
55
Global
10
55
Legacy (20%) — Historical Impact
Historical
25
65
Longevity
10
60
Leadership (15%) — Power & Stability
Tenure
40
30
Stability
10
40
Strategy (15%) — Tactics & Innovation
Strategy
30
85
Tactics
25
90
Reform
20
80
Similar Comparisons
Comments & Discussion
No comments yet. Be the first to share your thoughts!