Loading...
Bahram IV vs Seti II
Bahram IV leads by 2.4 pts · 2 figures compared
…
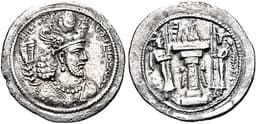
Bahram IV
Emperor · Ancient
38.6Total
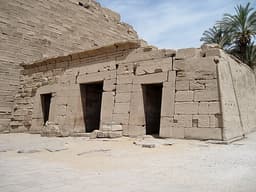
Seti II
Emperor · Ancient
36.2Total
Basic Information
Born
370
-1203
Died
399
-1197
Era
Ancient
Ancient
Nationality
Sasanian Empire
New Kingdom Egypt
Occupation
Emperor
Emperor
Civilization
Middle Eastern
Middle Eastern
Score Comparison
Military (10%)
50.0
22.6
Political (20%)
26.4
32.1
Influence (20%)
44.0
43.2
Legacy (20%)
33.3
34.2
Leadership (15%)
41.5
39.0
Strategy (15%)
41.0
39.6
TOTAL
38.6
36.2
Bahram IV — Complete Timeline
388 AD
Accession to the Sasanian thronePolitical Action◆ Major
Bahram IV became Shahanshah of the Sasanian Empire after the death of Shapur III. His reign was marked by conflicts with the Roman Empire and internal unrest.
SuccessionSasanian Empire
Impact: national
399 AD
Assassination by his own soldiersPolitical Action◆ Major
Bahram IV was killed by his own soldiers, likely due to dissatisfaction with his rule or military failures. His death led to a succession crisis.
AssassinationMilitary Revolt
Impact: nationaltragic
Seti II — Complete Timeline
1203 BC
Usurpation by AmenmessePolitical Action◆ Major
Early in Seti II's reign, a rival named Amenmesse seized control of Upper Egypt and Nubia, claiming the throne. Seti II was forced to contend with this usurpation, which divided the kingdom and weakened central authority. The conflict lasted several years before Seti II regained control.
UsurpationCivil WarDynasty XIX
Impact: nationaldestructive
1200 BC
Restoration of Order in ThebesPolitical Action
After suppressing Amenmesse's revolt, Seti II reasserted his authority over Thebes. He ordered the erasure of Amenmesse's name from monuments and restored the power of the priesthood. This action stabilized the region but did not fully reverse the decline of Dynasty XIX.
RestorationThebesPriesthood
Impact: nationalconstructive
Construction of Tomb KV15Cultural
Seti II commissioned his tomb in the Valley of the Kings (KV15). The tomb's decoration was left incomplete, reflecting the troubled times. It was later usurped by later pharaohs. The tomb provides archaeological evidence of the period's artistic and political instability.
TombValley of the KingsArchaeology
Expert Analysis
Bahram IV vs Seti II: Historical Comparison This comprehensive analysis compares Bahram IV (Emperor, Ancient era) and Seti II (Emperor, Ancient era) across six quantitative dimensions of historical impact and achievement. The comparison evaluates both figures using the HistoryVersus v4.0 scoring system, which measures: Military capability (10% weight), Political governance (20%), Historical Influence (20%), Lasting Legacy (20%), Leadership effectiveness (15%), and Strategic innovation (15%). Each dimension is scored on a 0-100 scale using structured historical data including battle records, political reforms, territorial expansion, cultural impact, and institutional longevity. Seti II holds a numerical advantage with a total composite score of 45 compared to Bahram IV's 41. However, raw scores alone do not capture the full historical picture — the detailed dimension-by-dimension breakdown reveals where each figure excelled and where they fell short relative to their historical context. Explore the full comparison below to see the complete score breakdown across all six dimensions, side-by-side event timelines, and detailed analysis of their respective historical contributions.
Rankings
🥇
Bahram IVLeader
Mil: 50.0Pol: 26.4Inf: 44.0
38.6
🥈
Seti II
Mil: 22.6Pol: 32.1Inf: 43.2
36.2
+2.4 behind
How This Comparison Works
Algorithm
Each figure is scored on 6 dimensions (0—100 scale) based on structured historical data: Military (10%), Political (20%), Influence (20%), Legacy (20%), Leadership (15%), Strategy (15%). The weighted total produces the final ranking.
Data Sources
Scores are computed from structured sub-indicators in the database. Scale factors adjust for era (Ancient ×0.85, Modern ×1.0) and civilization size (Eastern ×1.05, Other ×0.80) to account for differences in population and military scale.
Maximum 3 Figures
Comparisons are limited to 2—3 figures to ensure readability and statistical meaningfulness.
Error Margins
±5 points per dimension — Sub-scores are derived from historical records with inherent uncertainty. Two figures within 5 points on a dimension should be considered roughly equivalent in that area.
Total Score Accuracy
±3 points overall — The weighted combination of 6 dimensions produces a total score with approximately ±3 points of uncertainty. Differences of less than 3 points are not statistically significant— the figures are effectively tied.
Known Limitations
- Historical records are incomplete and uneven across civilizations
- Figures from oral-tradition societies may be underrepresented
- Occupation labels can misclassify multi-role figures
- Scores measure capability and impact, not moral character
- Quantitative scoring is a comparison tool, not absolute truth
Capability Radar
Military (10%) — Battles & Warfare
Battles
20
10
Win Rate
15
10
Expansion
10
5
Political (20%) — Governance & Reform
Reform
20
10
Diplomacy
20
10
Economy
20
10
Influence (20%) — Cultural & Global Reach
Cultural
10
10
Global
10
5
Legacy (20%) — Historical Impact
Historical
10
15
Longevity
10
10
Leadership (15%) — Power & Stability
Tenure
40
15
Stability
10
10
Strategy (15%) — Tactics & Innovation
Strategy
20
10
Tactics
20
10
Reform
10
5
Similar Comparisons
Comments & Discussion
No comments yet. Be the first to share your thoughts!