Loading...
This comparison has not been analyzed yet.
One-time AI generation (~1 minute). Scores and timeline are already available below.
Al-Tai vs Margaret II of Avesnes
Margaret II of Avesnes leads by 0.5 pts · 2 figures compared
…
Al-Tai
Emperor · Medieval
37.6Total
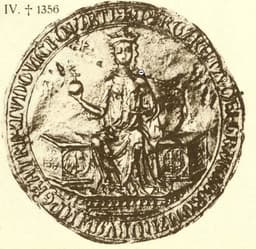
Margaret II of Avesnes
Emperor · Medieval
38.1Total
Basic Information
Born
932
1311
Died
1003
1356
Era
Medieval
Medieval
Nationality
Abbasid Caliphate
Hainaut
Occupation
Emperor
Emperor
Civilization
Middle Eastern
Western
Score Comparison
Military (10%)
20.0
20.0
Political (20%)
32.1
29.3
Influence (20%)
46.3
46.3
Legacy (20%)
35.0
37.5
Leadership (15%)
33.6
41.5
Strategy (15%)
54.3
45.0
TOTAL
37.6
38.1
Al-Tai — Complete Timeline
974 AD
Accession of Al-TaiPolitical Action◆ Major
Al-Tai became caliph after the abdication of his father Al-Muti. His reign continued the pattern of Buyid domination, with the caliph serving as a ceremonial figurehead.
AccessionBuyid ControlFigurehead
Impact: national
991 AD
Deposition by the BuyidsPolitical Action◆ Major
Al-Tai was deposed by the Buyid emir Baha al-Dawla, who replaced him with Al-Qadir. This event demonstrated the Buyids' complete control over the caliphate, as they could appoint and depose caliphs at will.
DepositionBuyidEnd of Reign
Impact: nationaltragic
1003 AD
Death of Al-TaiPolitical Action
Al-Tai died in obscurity after his deposition, having lived under Buyid supervision. His death marked the end of a reign that symbolized the Abbasid caliphate's complete subordination to foreign dynasties.
DeathObscurityBuyid
Impact: nationaltragic
Margaret II of Avesnes — Complete Timeline
1345 AD
Inherited Counties of Hainaut, Holland, and ZeelandPolitical Action◆ Major
Margaret II inherited the counties of Hainaut, Holland, and Zeeland after the death of her brother William II at the Battle of Warns. She became the last Avesnes ruler of these territories.
InheritanceAvesnesHainaut
Impact: regional
1350 AD
Conflict with the Wittelsbachs over HollandWar◆ Major
Margaret II fought a war against her son William I of Bavaria (Wittelsbach) for control of Holland and Zeeland. The conflict ended with the Treaty of 1354, where she ceded these territories to William.
WarWittelsbachSuccession
Impact: regionaldestructive
1354 AD
Ceded Holland and Zeeland to the WittelsbachsPolitical Action◆ Major
Margaret II of Avesnes, Countess of Hainaut, ceded the counties of Holland and Zeeland to her son William I of Bavaria (Wittelsbach) after a period of conflict. This transfer ended Avesnes rule in Holland and Zeeland.
CessionWittelsbachHolland
Impact: regionaldestructive
This comparison has not been analyzed yet.
One-time AI generation (~1 minute). Scores and timeline are already available below.
Rankings
🥇
Margaret II of AvesnesLeader
Mil: 20.0Pol: 29.3Inf: 46.3
38.1
🥈
Al-Tai
Mil: 20.0Pol: 32.1Inf: 46.3
37.6
+0.5 behind
How This Comparison Works
Algorithm
Each figure is scored on 6 dimensions (0—100 scale) based on structured historical data: Military (10%), Political (20%), Influence (20%), Legacy (20%), Leadership (15%), Strategy (15%). The weighted total produces the final ranking.
Data Sources
Scores are computed from structured sub-indicators in the database. Scale factors adjust for era (Ancient ×0.85, Modern ×1.0) and civilization size (Eastern ×1.05, Other ×0.80) to account for differences in population and military scale.
Maximum 3 Figures
Comparisons are limited to 2—3 figures to ensure readability and statistical meaningfulness.
Error Margins
±5 points per dimension — Sub-scores are derived from historical records with inherent uncertainty. Two figures within 5 points on a dimension should be considered roughly equivalent in that area.
Total Score Accuracy
±3 points overall — The weighted combination of 6 dimensions produces a total score with approximately ±3 points of uncertainty. Differences of less than 3 points are not statistically significant— the figures are effectively tied.
Known Limitations
- Historical records are incomplete and uneven across civilizations
- Figures from oral-tradition societies may be underrepresented
- Occupation labels can misclassify multi-role figures
- Scores measure capability and impact, not moral character
- Quantitative scoring is a comparison tool, not absolute truth
Capability Radar
Military (10%) — Battles & Warfare
Battles
5
5
Win Rate
5
5
Expansion
5
5
Political (20%) — Governance & Reform
Reform
10
20
Diplomacy
10
30
Economy
10
20
Influence (20%) — Cultural & Global Reach
Cultural
10
10
Global
5
5
Legacy (20%) — Historical Impact
Historical
10
15
Longevity
10
10
Leadership (15%) — Power & Stability
Tenure
20
30
Stability
10
20
Strategy (15%) — Tactics & Innovation
Strategy
5
5
Tactics
5
5
Reform
5
5
Similar Comparisons
Comments & Discussion
No comments yet. Be the first to share your thoughts!